QUICK START GUIDE
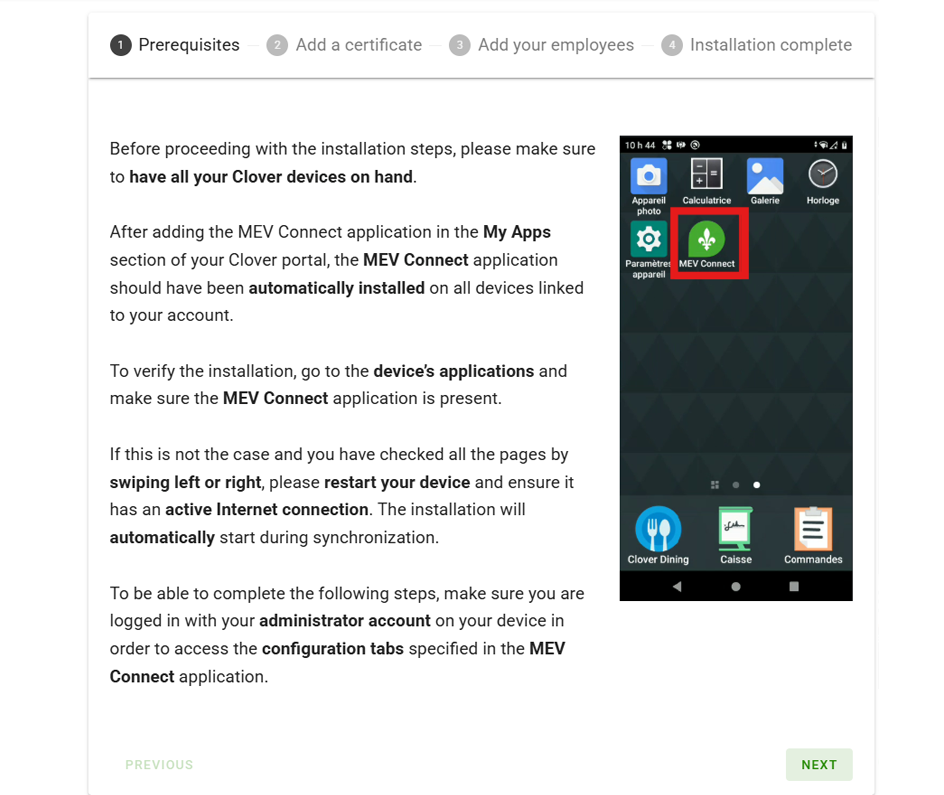
Make sure you have all your Clover devices on hand. You will also need the information listed on the side to set up your MEV Connect administrator account.
You’ll be guided step by step through the configuration process so you can quickly resume your operations.
Note : If you’ve chosen assisted installation with our technical team, that information is not required immediately but must be available at the time of your appointment.
Required information
- Contact details of your technical manager
- Revenu Québec authorization code
- Revenu Québec file number
- QST number
- GST number
- Complete business contact information
READY TO START!
[ 1 ] installation
1.1 – Adding the MEV Connect app to your Clover account.
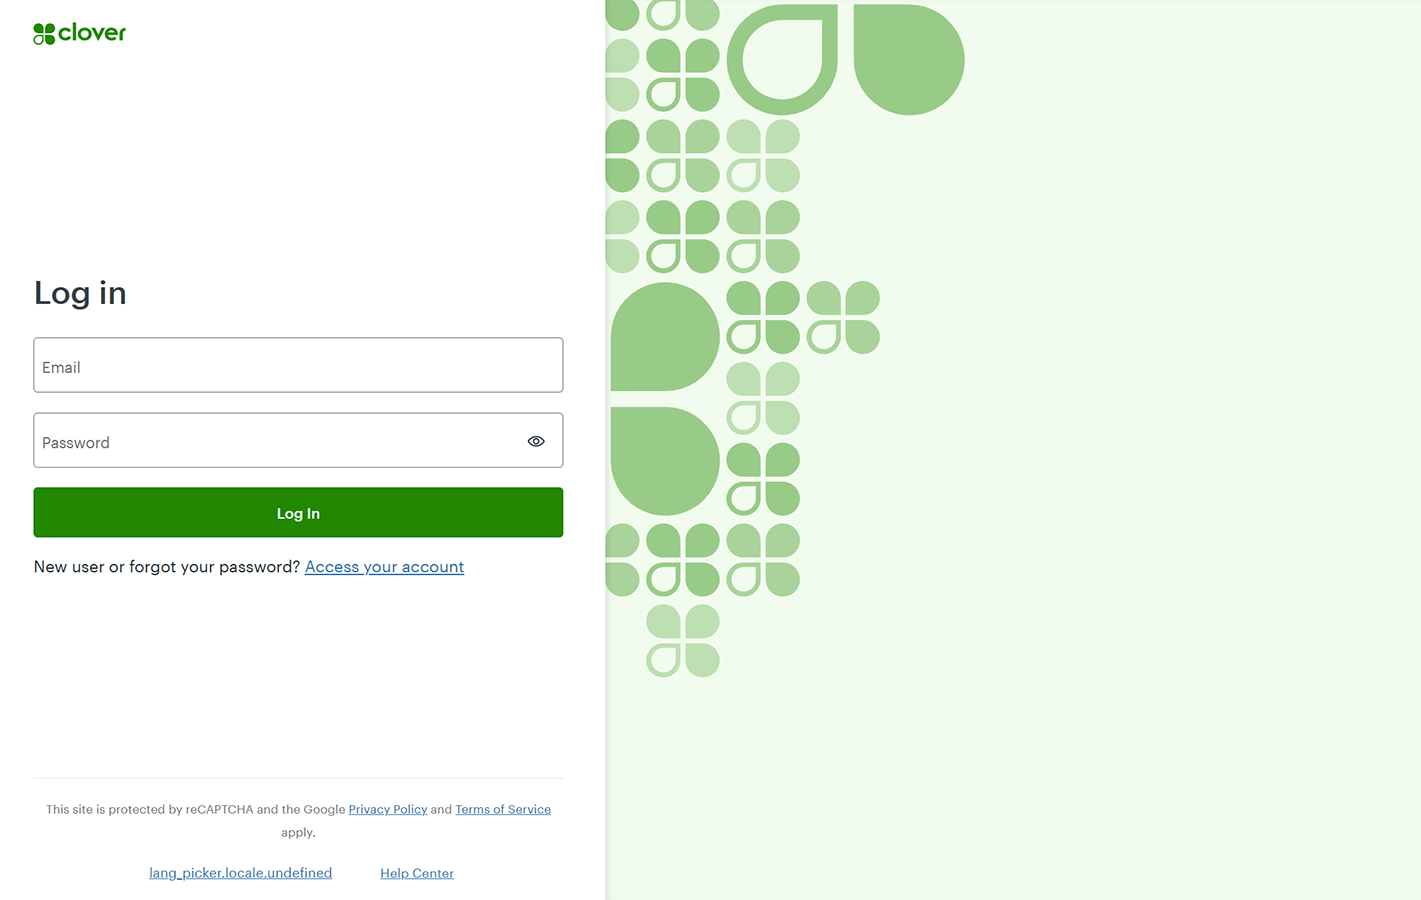
Click the button below to access your account via the Clover login portal.
Sign in using your usual credentials.
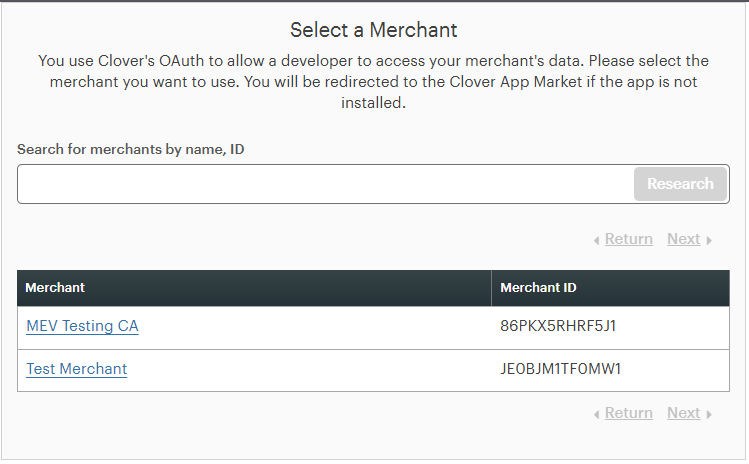
1.2 – Merchant selection (IF APPLICABLE)
If multiple merchants are linked to your Clover account, select the one for which you wish to install the application.
Note : If you want to complete the installation for more than one merchant account, you will need to repeat the process for each of them.
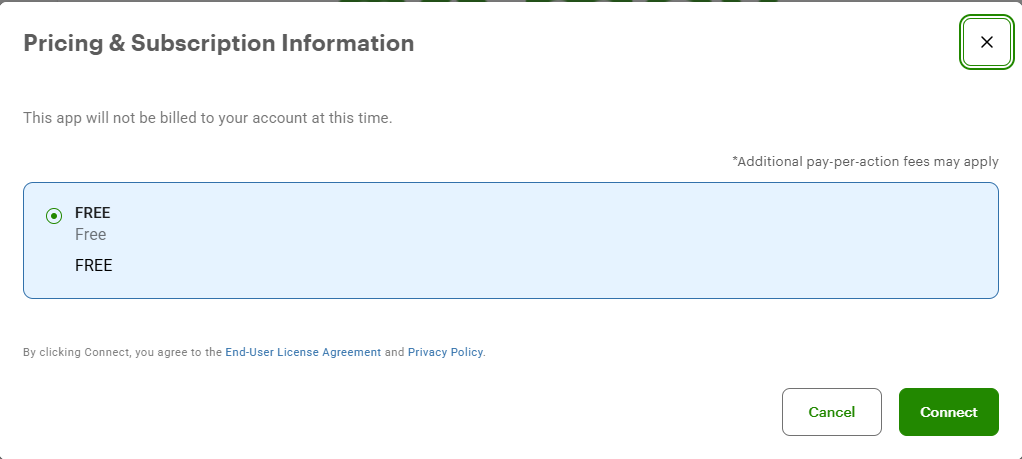
1.3 – Install the MEV Connect App.
On the MEV Connect page in the Clover App Market, click the "Connect" button in the first window, then the second.
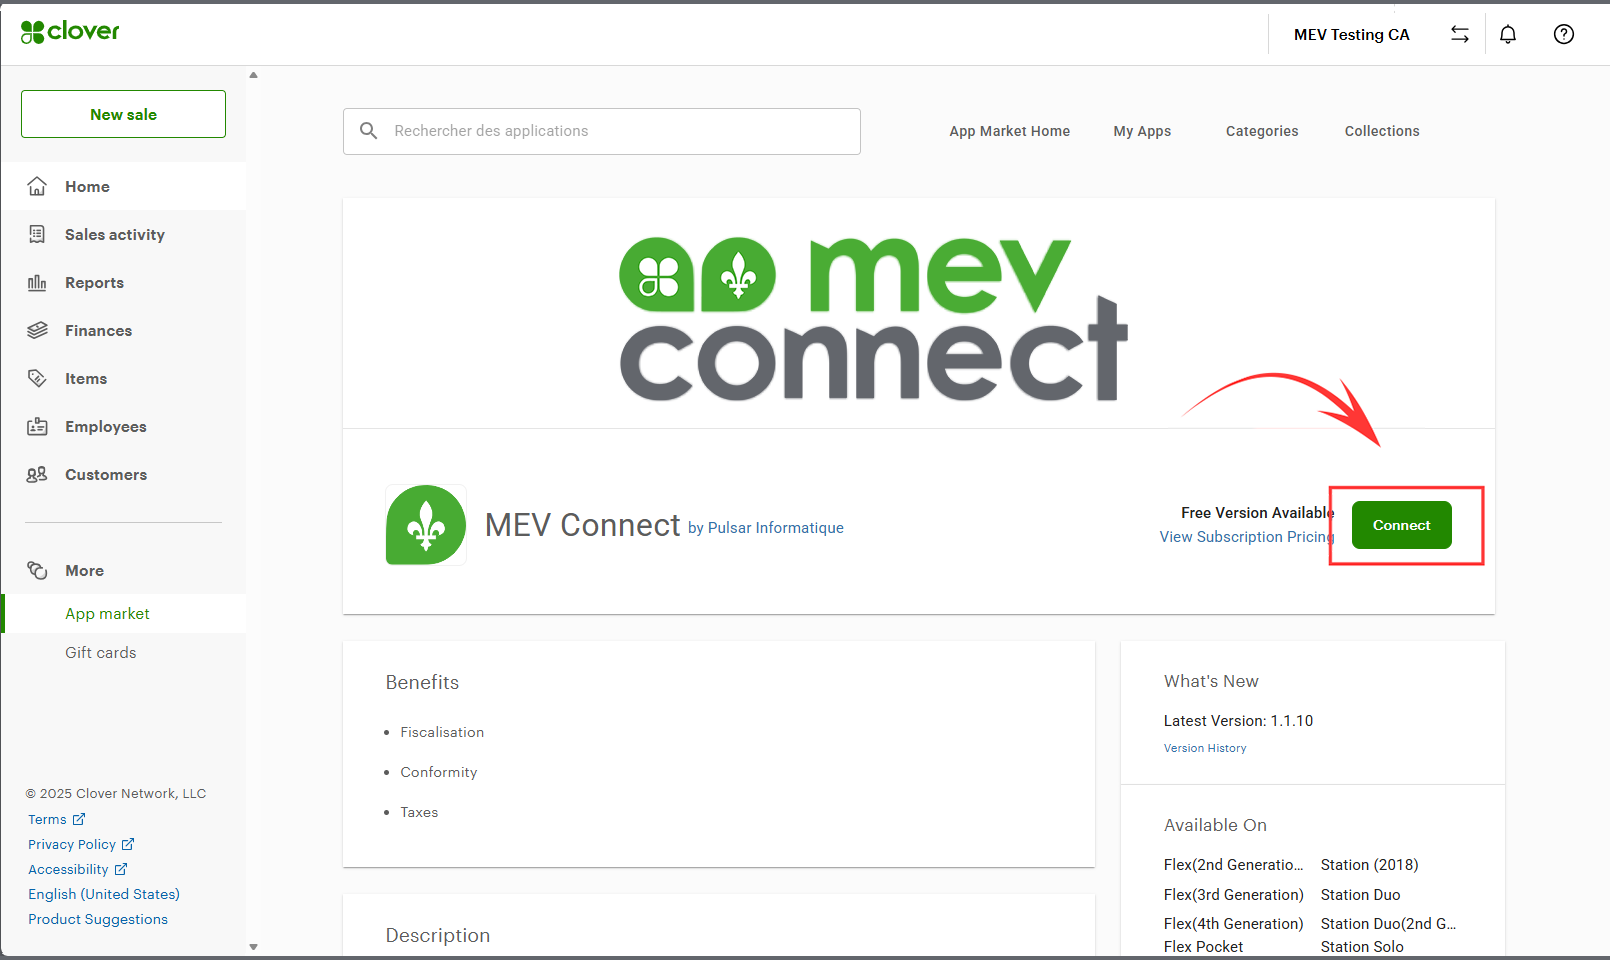
Proceed now to Step 2: Subscription.
[ 2 ] subscription
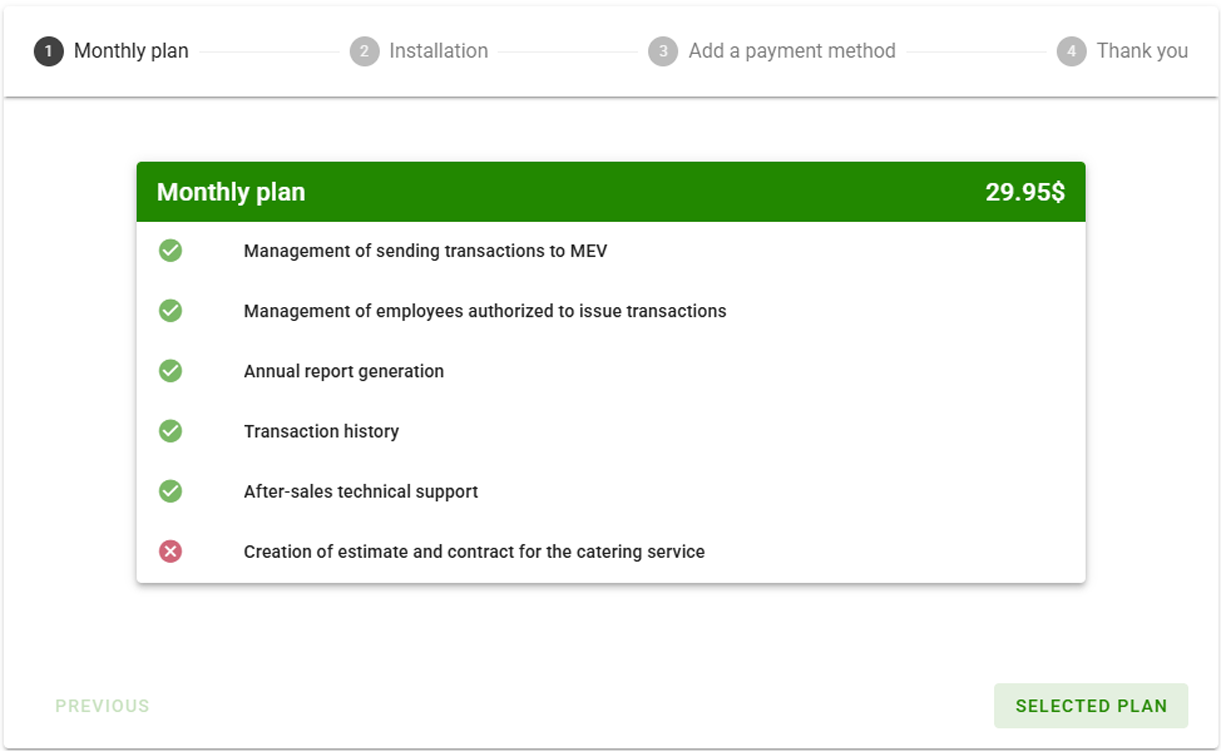
2.1 – Review the monthly plan.
The first window details everything included in your $29.95 CAD monthly subscription.
As this is currently the only available option, simply click the “NEXT” button to continue.
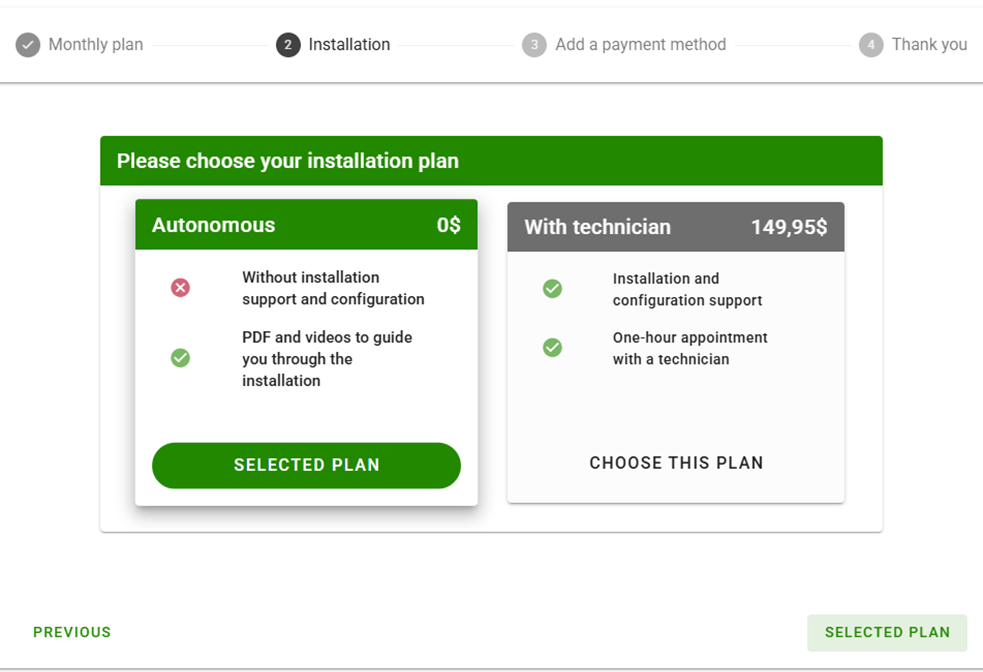
2.2 – Choose your installation method.
Select your installation method by clicking “CHOOSE THIS PLAN” in one of the two options provided.
- If you're comfortable with your IT systems and payment terminals, you can choose the free self-installation option.
- Otherwise, our team can guide you step-by-step with our turnkey support service for only $149.95 CAD.
Click “SELECTED PLAN” to proceed with payment.
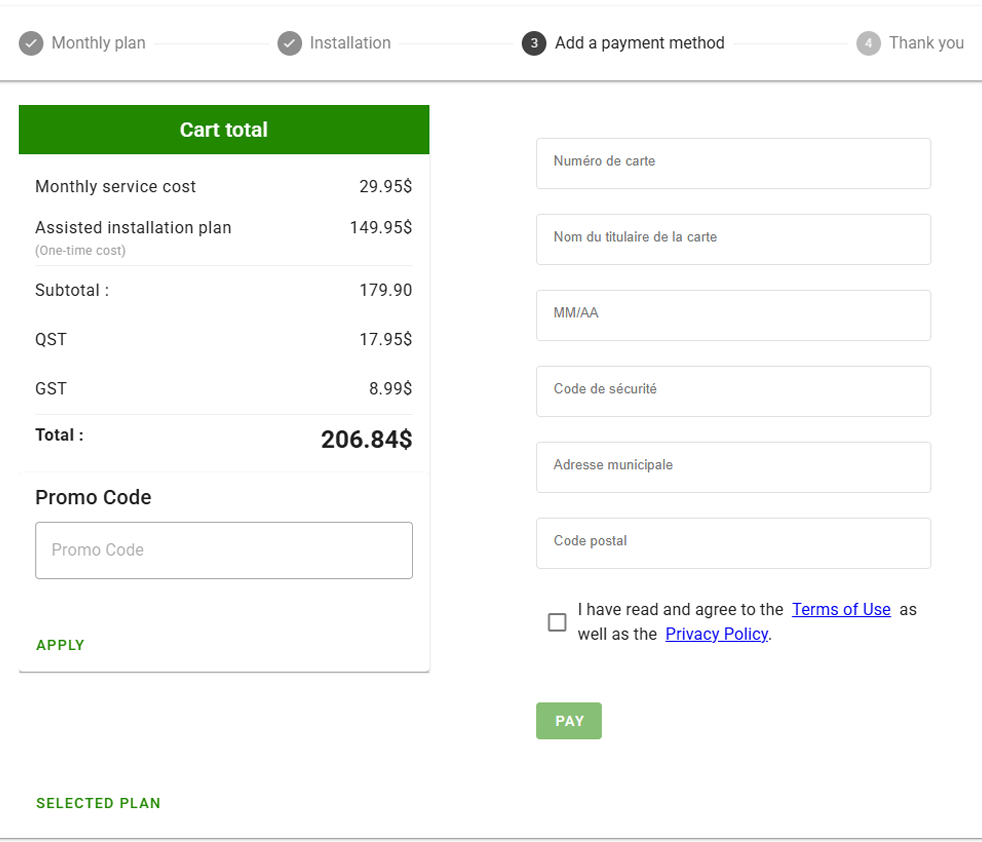
2.3 – Proceed to payment.
Complete your MEV Connect registration by filling in the required fields.
Note: If you received a promotional code from one of our partners, enter it in the designated field and click “APPLY”.
Check the box to accept the Terms of Use and Privacy Policy.
Click “PAY” to complete your subscription to MEV Connect.
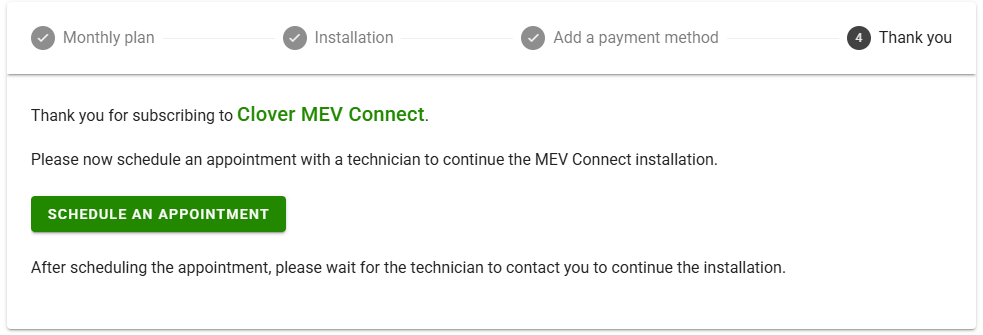
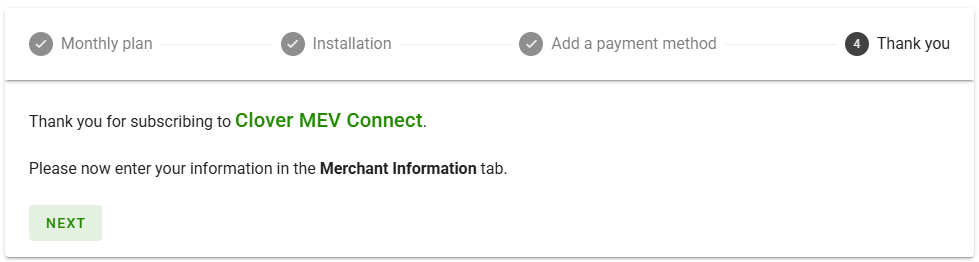
2.4 – Final step / Schedule your installation.
You’ve completed your subscription!
For self-installation, proceed directly to Step 4.
For assisted installation, click the
“SCHEDULE AN APPOINTMENT”.
button below and continue to Step 3.
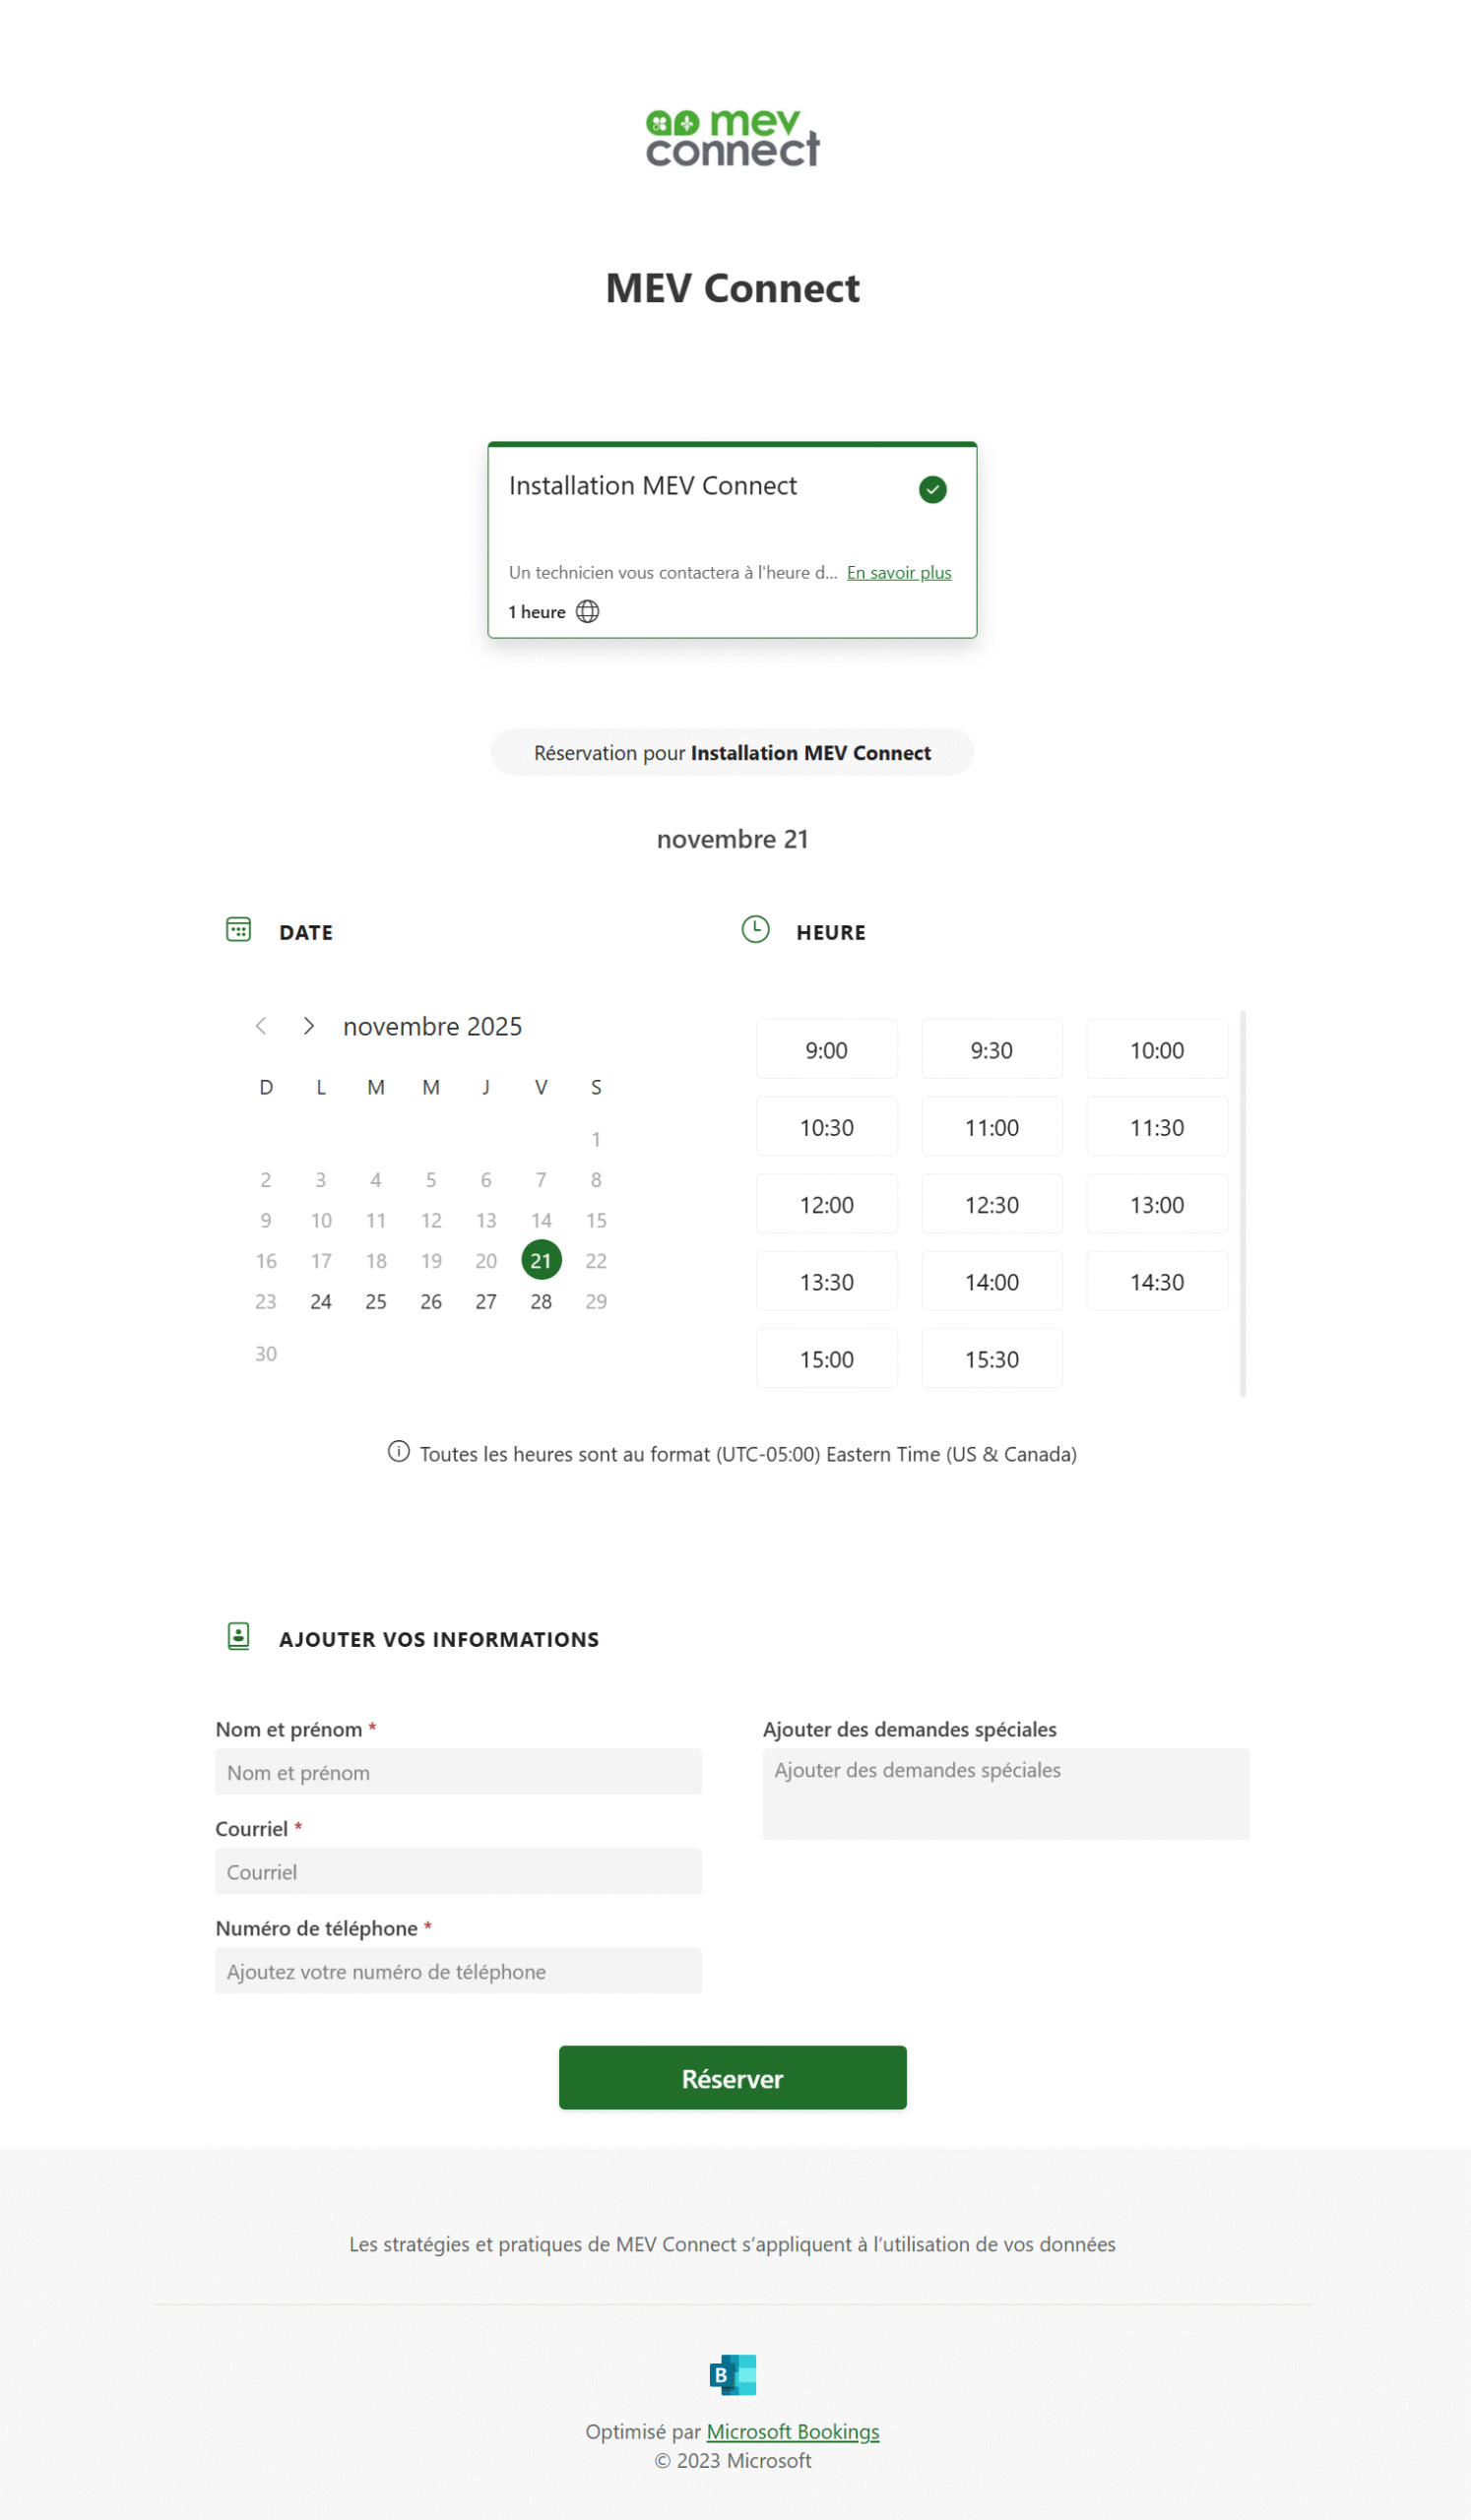
[ 3 ] APPOINTMENT
Book your appointment for assisted installation.
Allow approximately 1 hour for your session with our technical team.
- Select a date from the calendar (a minimum 24-hour delay is required).
- Select the desired time from the available options on the right side of the calendar.
- Enter your contact details in the designated fields.
Then click on
"BOOK NOW".
You will receive a confirmation email for your appointment within the next minute.
Make sure to have the information listed at the top of this page on hand during your meeting with our technical team.
[ 4 ] Self-installation
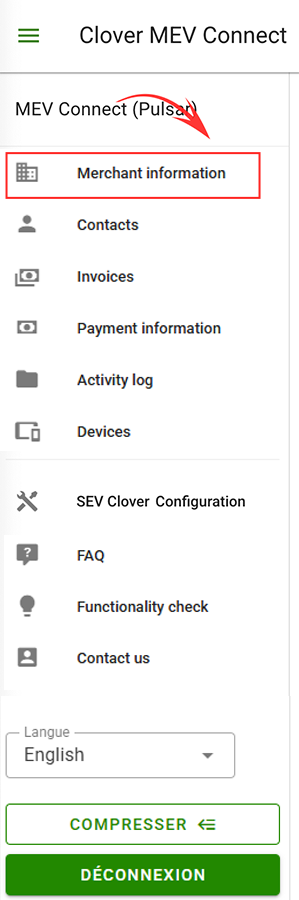
4.1 – Enter the platform and complete the Merchant information tab.
At the end of your subscription, you will be automatically redirected to the MEV Connect platform by clicking “SELECTED PLAN”.
In the “Merchant information” tab that opens by default, fill in the fields with the information you previously prepared.
The QST number format must contain 16 characters (1234567890TQ0001). The GST number format must contain 15 characters (123456789RT0001).
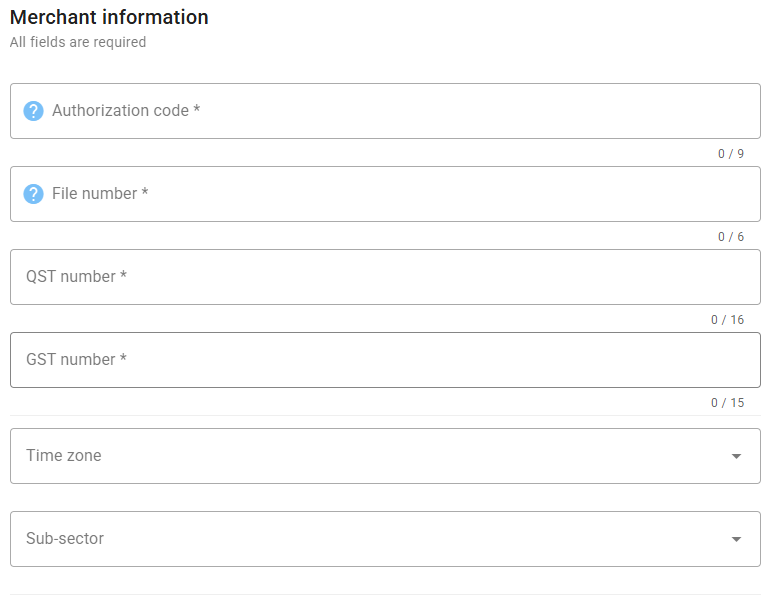
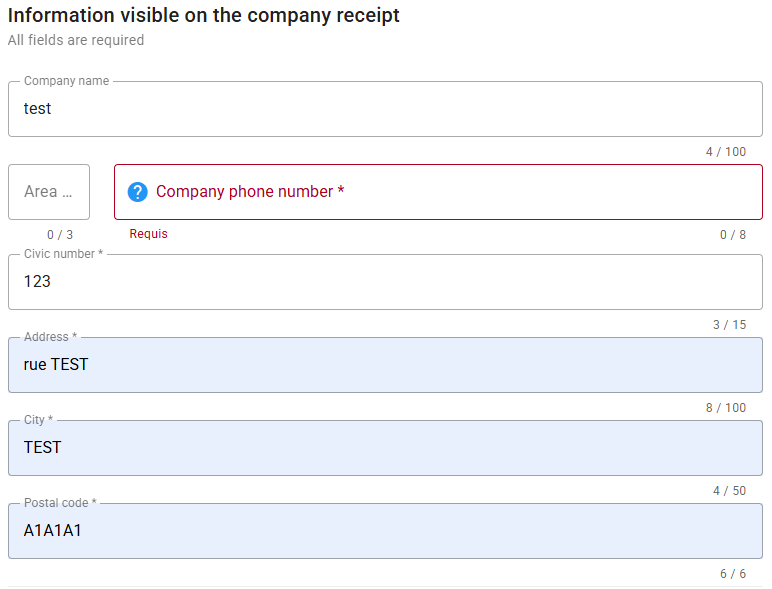
In the following fields, enter the business contact details that will appear on printed receipts, then click “SAVE”.

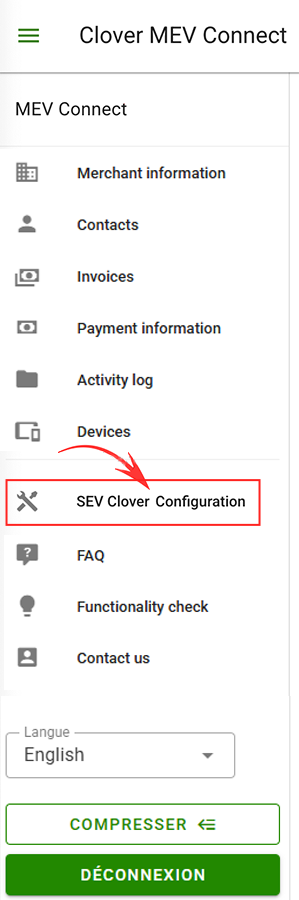
4.2 – Configuring Clover SEV
You will then be directed to the Clover SEV configuration tab, where you simply need to follow the on-screen instructions to continue the setup process.
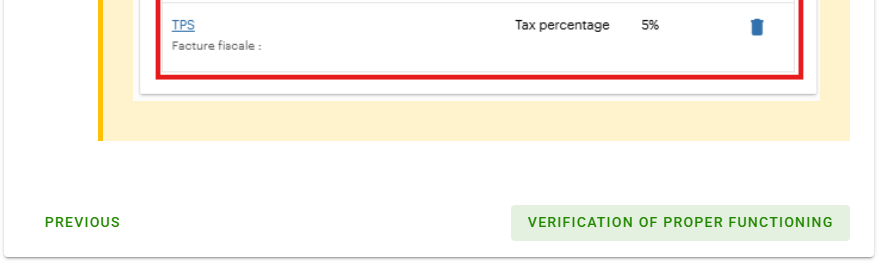
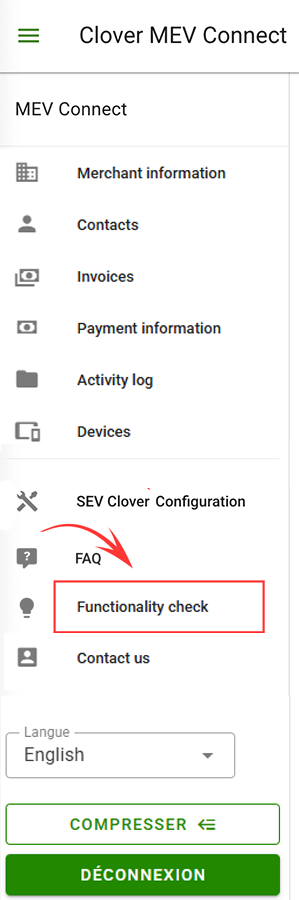
After clicking “VERIFICATION OF PROPER FUNCTIONING” in the final window, you will automatically be redirected to the tab with the same name.
4.3 – Installation validation.
To ensure everything is working properly and your setup is compliant, perform a $5 test transaction by following the on-screen instructions. Then carefully compare the printed receipt with the sample below to confirm its accuracy.
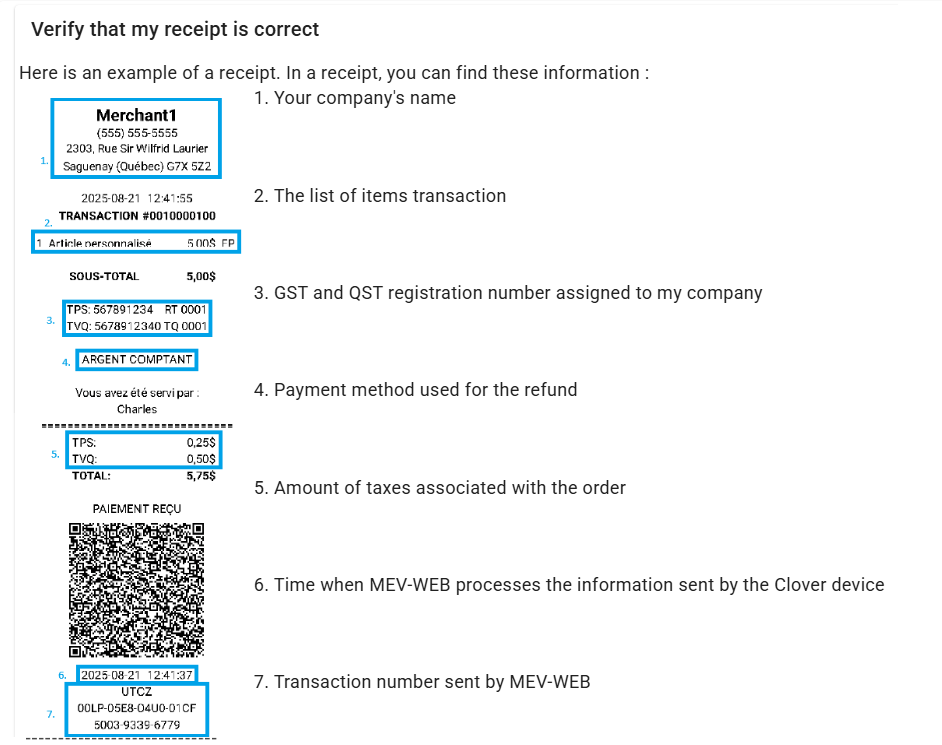
Then, proceed with refunding this transaction to confirm that the full cycle — sale and refund — is also functional and compliant.
Congratulations, installation is complete!
If something doesn’t seem to be working properly, feel free to contact our support team at: support@mevconnect.ca.